Introduction
Outdoor projection mapping has transformed the way brands, cities, and event organizers create immersive visual experiences. From large-scale building projections and cultural festivals to product launches and architectural storytelling, projection mapping has evolved into a powerful visual communication tool. However, achieving professional-grade results outdoors requires more than creative content — it demands the right equipment.
Selecting the right outdoor projection mapping projector is one of the most critical decisions in any large-scale visual production. Unlike indoor setups, outdoor environments introduce variables such as ambient light, weather exposure, projection distance, and surface irregularities. Without a properly specified projector, even the most stunning visual design can lose impact due to insufficient brightness, poor resolution, or technical limitations.
In this guide, you’ll learn how to evaluate projector specifications, understand key performance metrics, compare projection technologies, and optimize your setup for large-scale professional use. Whether you’re planning a building facade projection, a monument activation, or a high-profile outdoor event, this article will help you choose an outdoor projection mapping projector that delivers exceptional clarity, brightness, and reliability.
Understanding Outdoor Projection Mapping: What It Is and Why It Matters
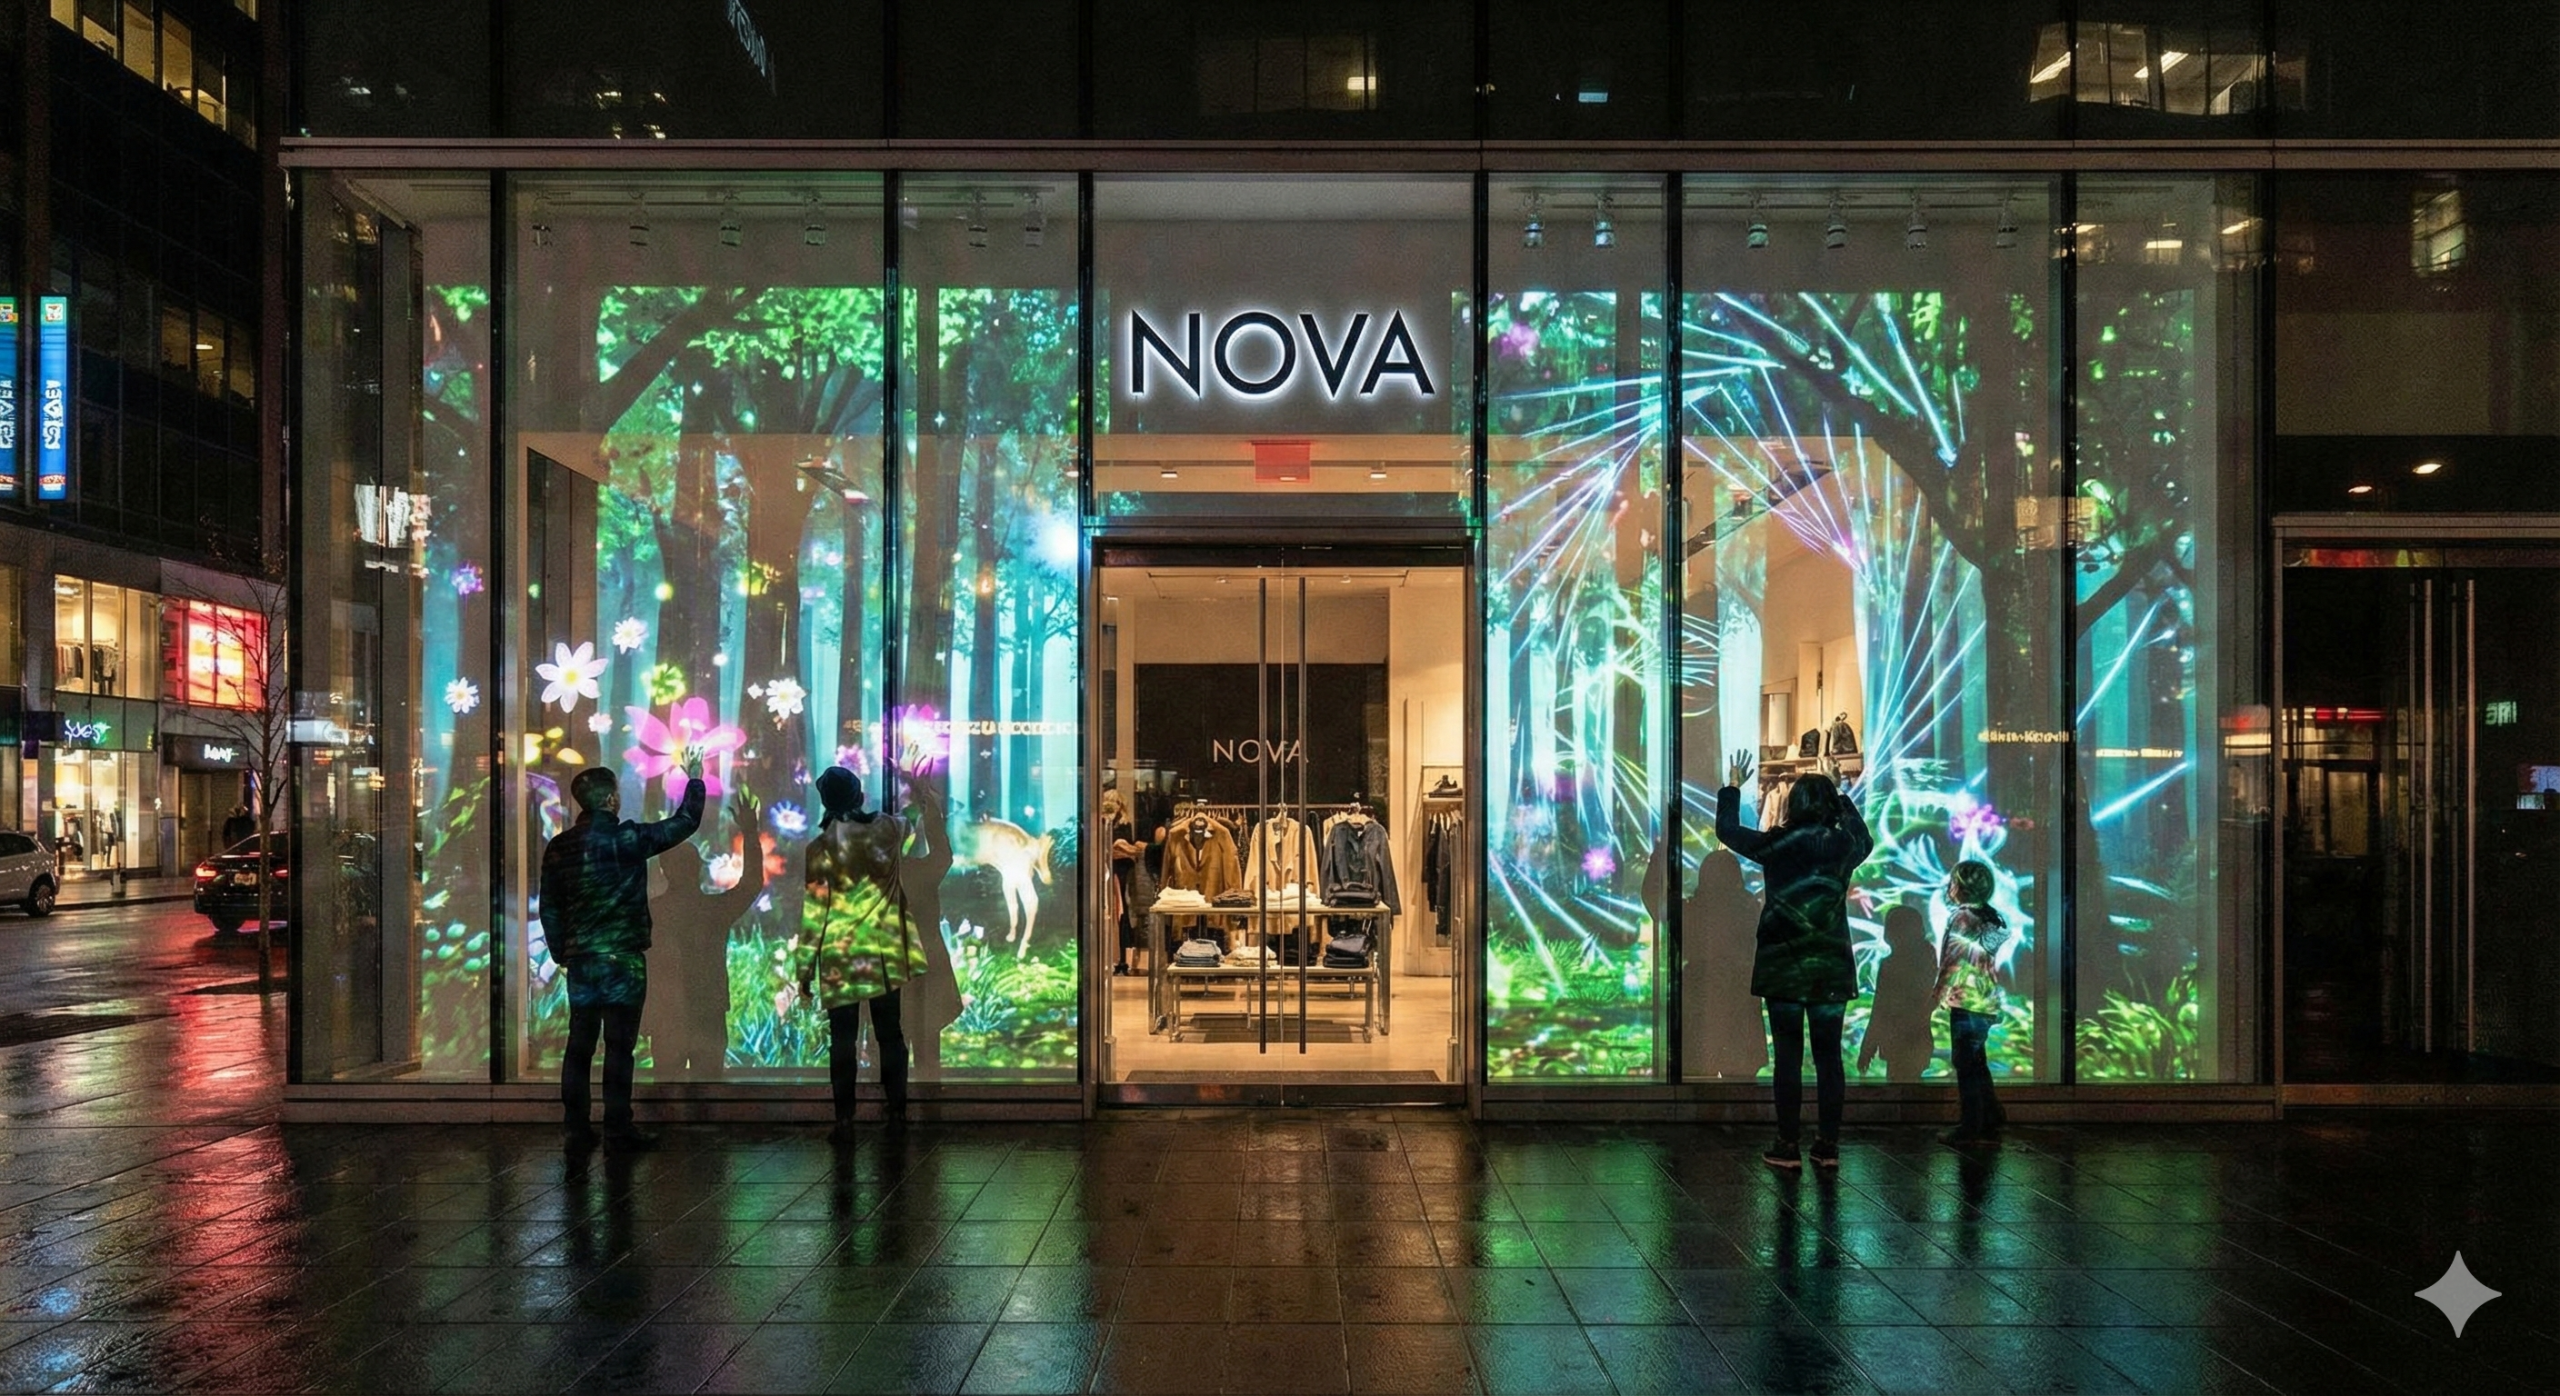
Outdoor projection mapping is one of the most powerful visual technologies used in large-scale events, architectural showcases, brand activations, and cultural festivals. Unlike traditional projection, projection mapping transforms buildings, monuments, and irregular surfaces into dynamic visual canvases. However, achieving professional-grade results outdoors requires a deep understanding of both creative and technical considerations.
Let’s break this down.
What Is Projection Mapping?
Projection mapping, also known as video mapping or spatial augmented reality, is a technique that uses specialized software to align projected visuals precisely onto three-dimensional surfaces. Instead of projecting onto a flat screen, the content is digitally “mapped” to match the geometry of buildings, statues, stages, or complex structures.

The process involves:
- 3D scanning or measuring the surface
- Creating a digital model
- Designing content tailored to architectural features
- Calibrating projectors for precise alignment
When executed properly, projection mapping creates illusions such as buildings collapsing, expanding, morphing, or transforming into immersive storytelling environments.
In outdoor environments, this technique becomes more complex due to scale, lighting conditions, and environmental variables. The outdoor projection mapping projector plays a critical role in maintaining accuracy, brightness, and clarity across large surfaces.
Projection mapping is widely used for:
- City festivals and cultural events
- Product launches and brand campaigns
- Tourism activations
- Government and national celebrations
- Entertainment and stage productions
Its impact lies in its ability to combine architecture with motion graphics, creating unforgettable large-scale experiences.
Why Outdoor Environments Require Specialized Projectors
Outdoor projection mapping introduces challenges that indoor projection simply does not face.
Key environmental factors include:
- Ambient light from street lamps and nearby buildings
- Weather conditions such as rain, humidity, dust, and wind
- Large projection distances
- Irregular and textured surfaces
- Temperature fluctuations
Because of these factors, a standard home or office projector is not suitable for outdoor mapping. Professional outdoor projection mapping projector systems are designed with:
- High lumen output (20,000–60,000+ lumens)
- Advanced cooling systems
- Durable chassis construction
- Interchangeable lenses
- Precision color calibration
In addition, outdoor installations often require protective enclosures or weatherproof housings to ensure safe operation during long events.
Brightness is especially critical. Outdoor surfaces absorb more light, and any competing light source reduces image contrast. Without sufficient brightness, visuals appear faded and lose their intended dramatic impact.
Reliability is another key consideration. Outdoor events are often public and high-profile, meaning equipment failure is not an option.
Professional vs. Consumer Projection Systems
Understanding the difference between professional and consumer projectors is essential when selecting equipment for outdoor projection mapping.
Consumer projectors typically offer:
- 2,000–5,000 lumens
- Fixed lens systems
- Limited color calibration
- Basic connectivity options
- Designed for indoor environments
While suitable for home theaters or small conference rooms, they lack the power and durability needed for large-scale outdoor use.
Professional projection systems, on the other hand, provide:
- 20,000+ lumens output
- Interchangeable lens options
- Edge blending and warping capabilities
- 24/7 operational reliability
- Advanced input/output connectivity
- Compatibility with media servers
They are engineered for demanding environments, large audiences, and complex installations.
When aiming for professional-grade results, investing in a true outdoor projection mapping projector is not optional — it is foundational to the success of the project.
Key Features to Look for in an Outdoor Projection Mapping Projector
Selecting the right outdoor projection mapping projector requires more than simply choosing the highest lumen output available. Professional-grade results depend on a combination of brightness, resolution, durability, and system compatibility. Each technical specification directly impacts visual performance, reliability, and long-term operational efficiency.
Below are the core features you must evaluate before making a decision.
Brightness (Lumens) Requirements for Outdoor Use
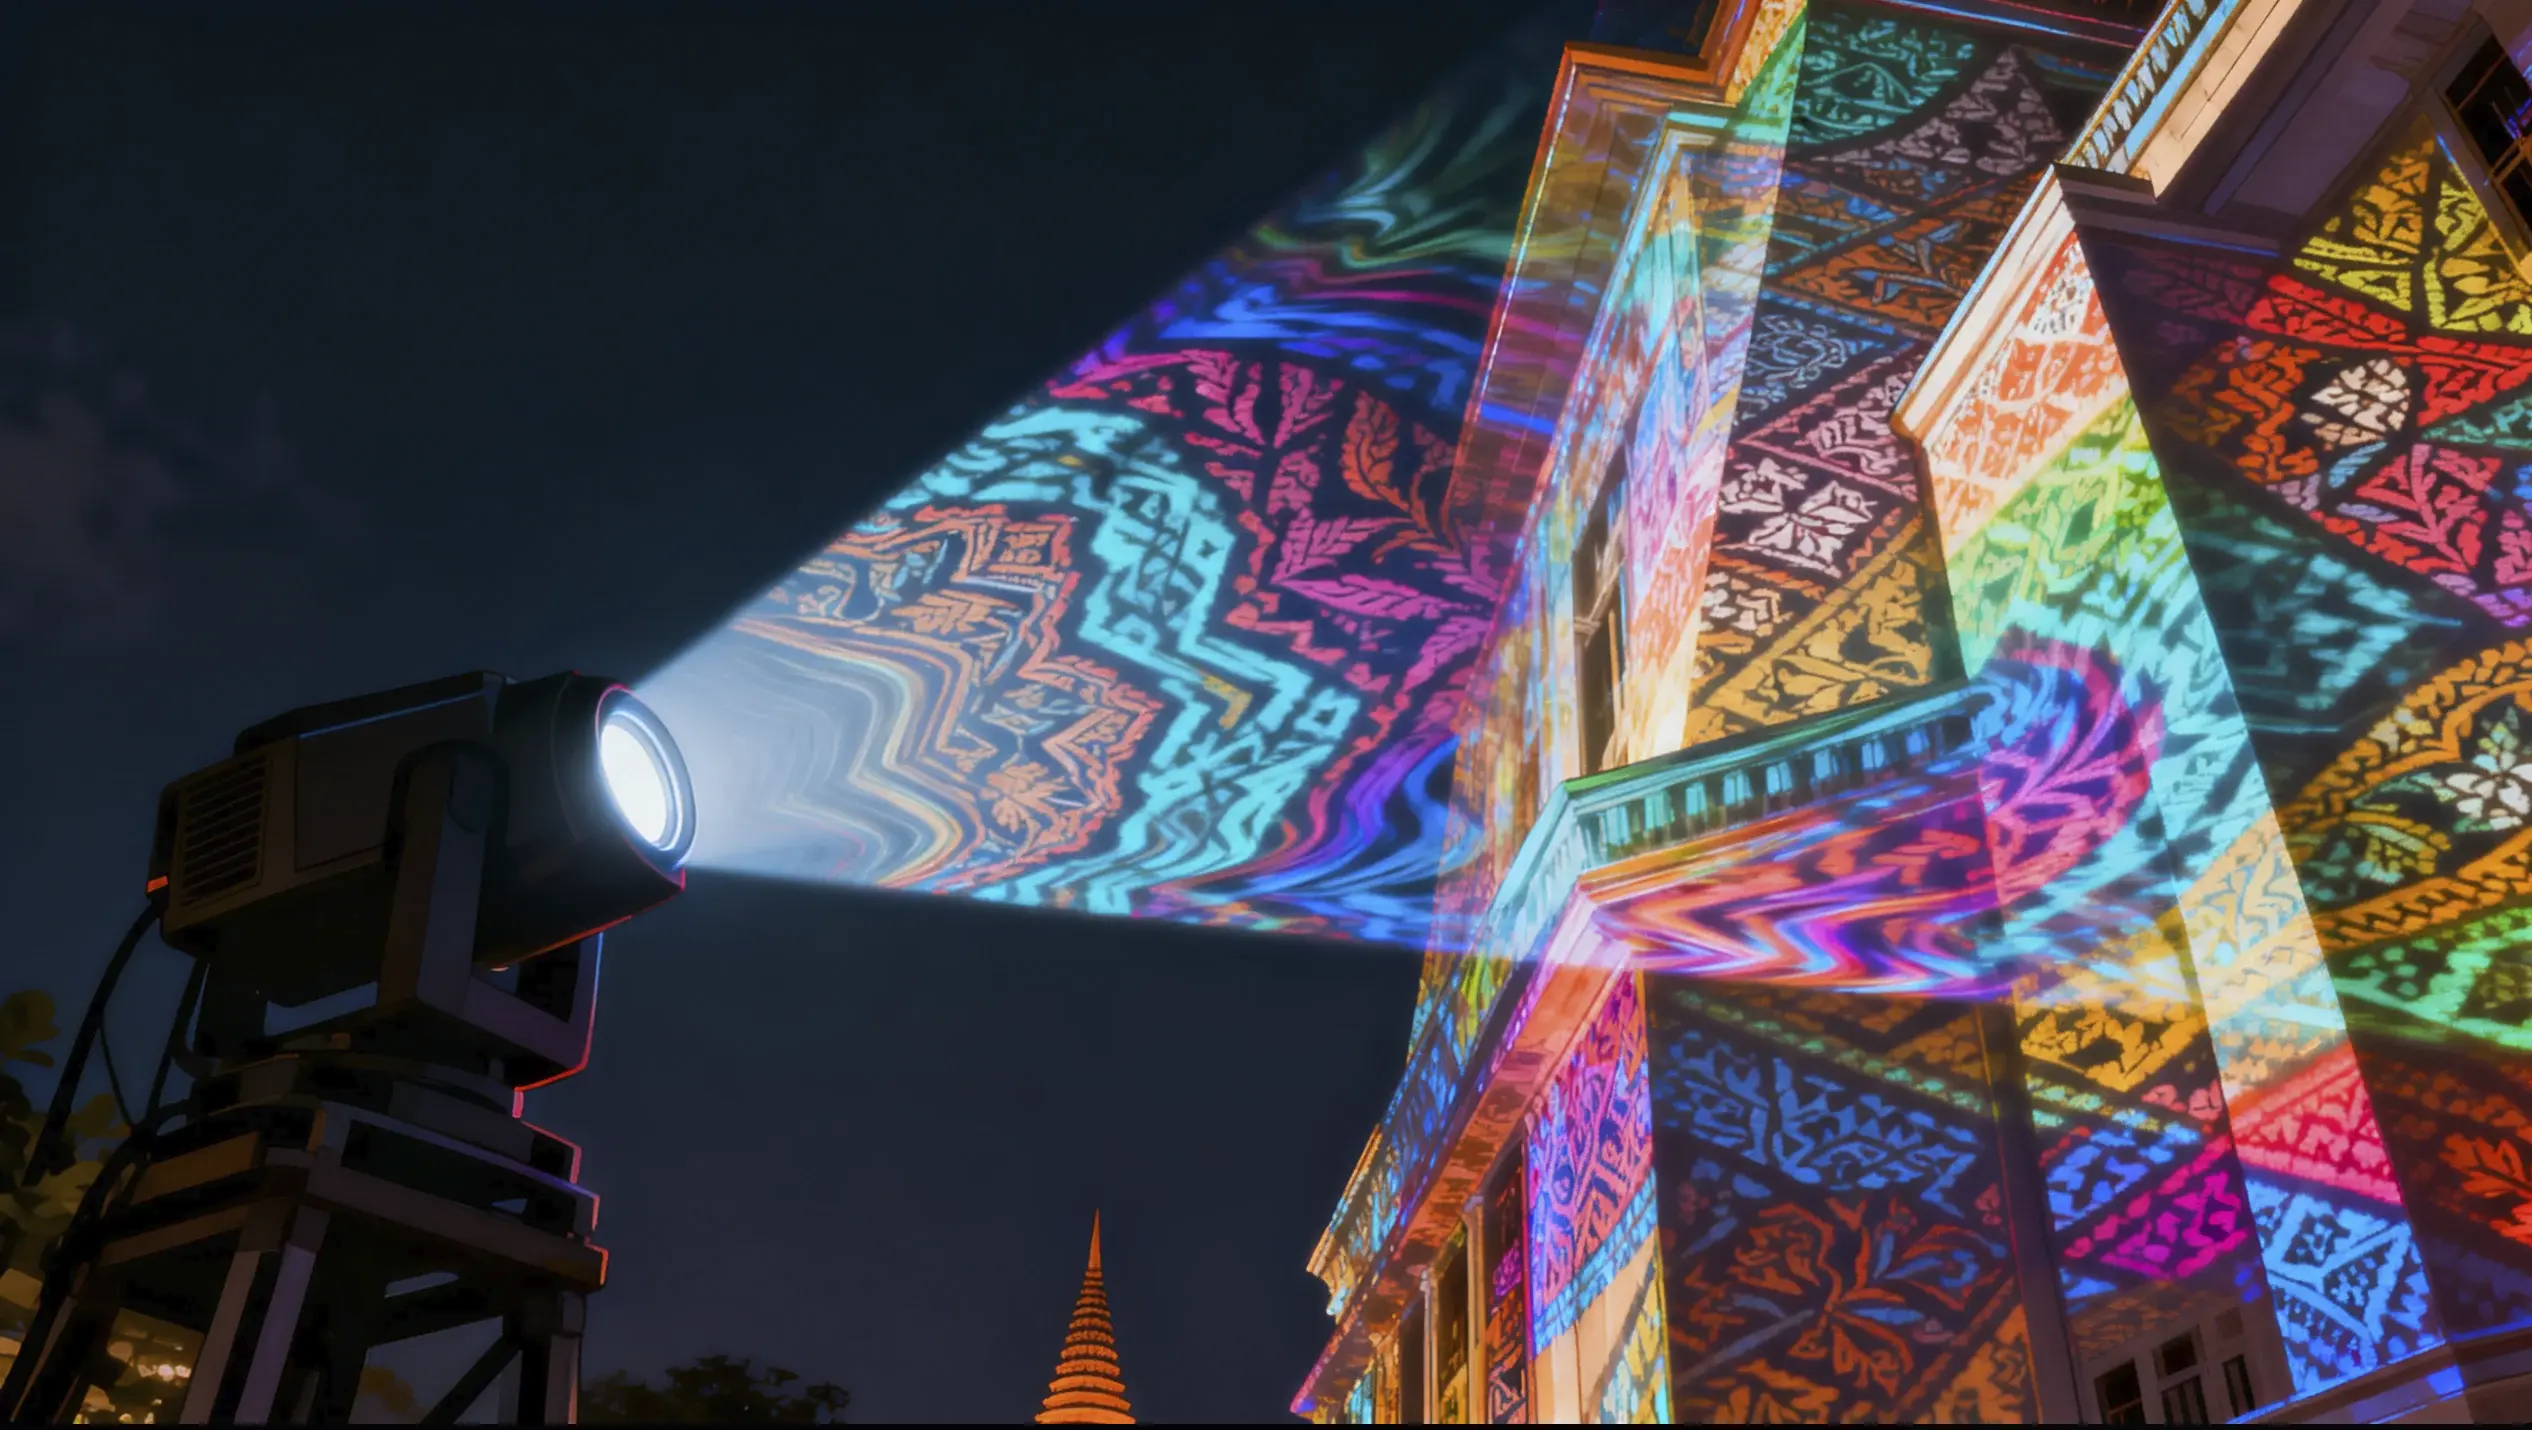
Brightness is the most critical factor in outdoor projection mapping. Since outdoor environments introduce ambient light pollution — including street lamps, nearby buildings, and passing vehicles — your projector must generate enough output to maintain strong contrast and vivid colors.
Professional outdoor applications typically require:
- 15,000–20,000 lumens for small façades
- 30,000–40,000 lumens for medium-sized buildings
- 50,000+ lumens for large landmarks
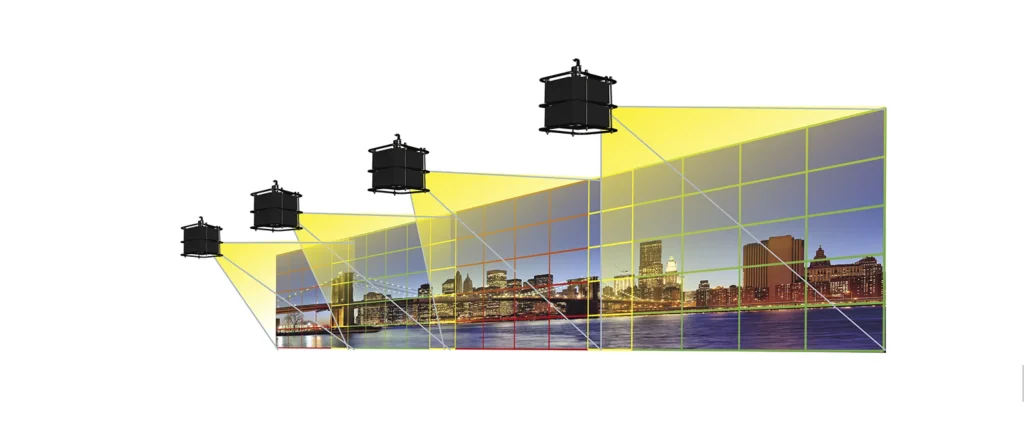
For large-scale architectural mapping, projector stacking is often used to combine brightness from multiple units. However, stacking requires precise alignment and edge blending to avoid visible seams.
If brightness is underestimated, visuals will appear washed out, especially in early evening settings. When selecting an outdoor projection mapping projector, always plan for slightly higher brightness than your minimum calculation to ensure visual impact.
Resolution and Image Clarity
Resolution determines how sharp and detailed your projection appears across large surfaces. As projection size increases, pixel stretching becomes more noticeable, particularly for audiences standing closer to the building.
Common professional resolutions include:
- WUXGA (1920×1200)
- 4K UHD (3840×2160)
- Native 4K for premium architectural shows
For complex animated visuals and detailed textures, higher resolution significantly improves realism and immersion.
Additionally, consider:
- Pixel density relative to surface size
- Viewing distance of the audience
- Content complexity (fine graphics vs bold visuals)
A mismatch between resolution and projection scale can result in soft edges and visible pixelation.
Weather Resistance and IP Ratings
Outdoor projection mapping introduces environmental risks. Rain, humidity, dust, and temperature fluctuations can affect projector performance and lifespan.
While most professional projectors are not fully weatherproof by default, they are often installed inside protective enclosures. When evaluating equipment, consider:
- IP-rated protective housings
- Temperature operating range
- Advanced cooling systems
- Dust-resistant internal design
For long-duration outdoor installations or touring productions, ruggedized projector systems or sealed enclosures are essential.
Weather protection ensures reliability and reduces downtime during high-profile events.
Connectivity and Media Server Compatibility
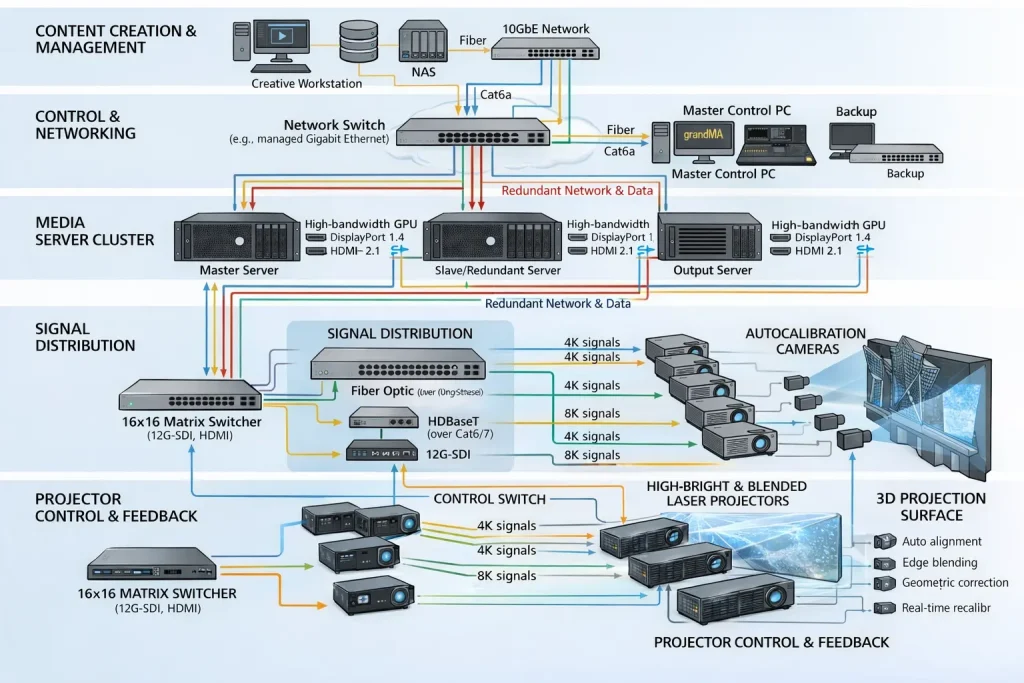
Outdoor projection mapping projects often involve complex technical ecosystems. Your projector must integrate seamlessly with media servers, control systems, and signal distribution networks.
Professional-grade projectors typically support:
- HDMI 2.0 / 2.1
- DisplayPort
- SDI
- HDBaseT
- Network control protocols
Compatibility with media servers allows for advanced features such as:
- Edge blending
- Geometric correction
- Multi-projector synchronization
- Real-time content control
A consumer projector may lack the connectivity options required for professional production environments.
When selecting an outdoor projection mapping projector, ensure it fits within your broader technical infrastructure.
| Feature | Minimum for Small Setup | Recommended for Professional Outdoor Use |
|---|---|---|
| Brightness | 15,000 lumens | 30,000–60,000+ lumens |
| Resolution | Full HD (1080p) | 4K UHD or Native 4K |
| Lens Options | Fixed lens | Interchangeable lenses |
| Weather Protection | Indoor-rated + enclosure | IP-rated housing or outdoor enclosure |
| Connectivity | HDMI | HDMI, SDI, HDBaseT, Network Control |
| Edge Blending | Limited | Full multi-projector blending support |
| Operational Reliability | Event-based | 24/7 capable professional system |
Professional vs Minimum Recommended Specifications Table
How Brightness, Resolution, and Throw Distance Affect Projection Mapping Quality
Achieving professional-grade outdoor projection mapping is not about maximizing one specification — it’s about balancing brightness, resolution, and throw distance correctly. These three technical factors work together to determine clarity, scale accuracy, and overall visual impact.
Understanding how they interact will help you select the right outdoor projection mapping projector for your specific project.
Calculating Required Lumens for Large Buildings
Brightness (measured in lumens) determines how visible your projection will be against ambient light. Outdoor surfaces absorb more light than projection screens, and city environments introduce additional light pollution.
When calculating lumen requirements, consider:
- Width and height of the projection surface
- Ambient light level
- Surface color (dark surfaces absorb more light)
- Desired visual intensity
Quick Reference Guide:
- Small façade (10–15m wide) → 15,000–20,000 lumens
- Medium building (20–30m wide) → 30,000–40,000 lumens
- Large landmark (30m+ wide) → 50,000+ lumens
For major public events, multiple projectors are often stacked to increase total brightness while maintaining redundancy.
Important: Underpowered brightness results in washed-out visuals and poor contrast, especially before full darkness.
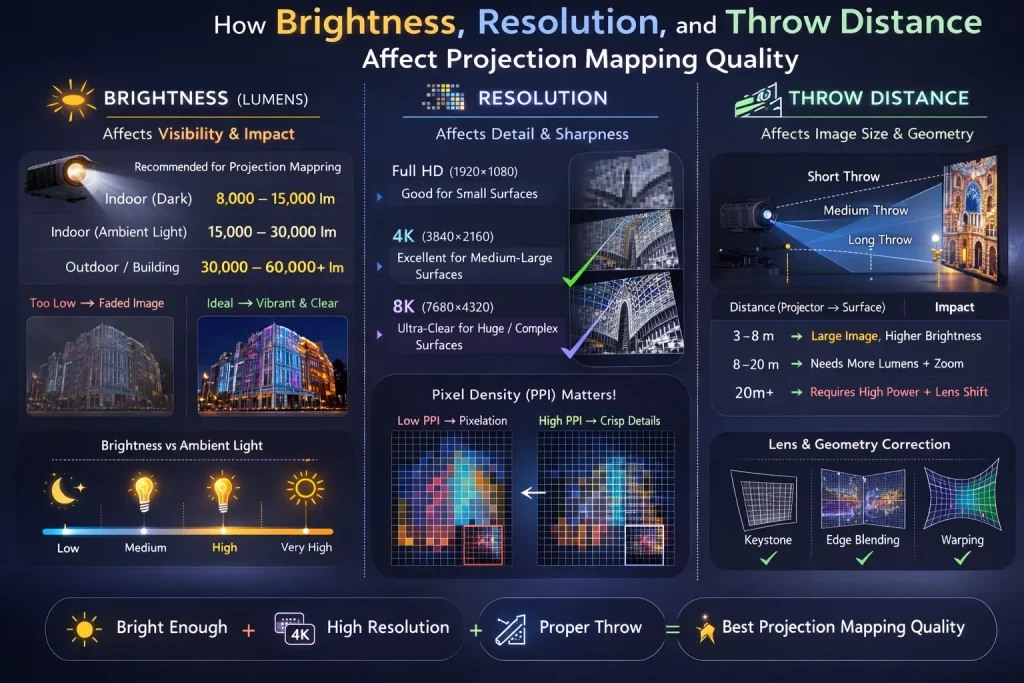
Short Throw vs. Long Throw Lenses
Throw distance refers to how far the projector is positioned from the projection surface. The required lens depends on physical space constraints at the site.
Throw Ratio Categories:
| Lens Type | Throw Ratio | Ideal Use Case |
|---|---|---|
| Short Throw | 0.8:1 – 1.5:1 | Limited space, stage mapping |
| Standard Throw | 1.5:1 – 3:1 | Mid-distance building projection |
| Long Throw | 3:1 – 10:1+ | Large public spaces, wide streets |
Professional outdoor projection mapping projector systems offer interchangeable lenses. This allows accurate image scaling without excessive digital keystone correction, which can reduce sharpness.
Selecting the wrong lens can cause:
- Incomplete surface coverage
- Distorted geometry
- Focus inconsistency across architectural features
Optical precision is essential for clean projection mapping alignment.
Pixel Density and Viewing Distance Considerations
Resolution determines how detailed your projection appears when scaled across large surfaces. However, perceived sharpness also depends on audience viewing distance.
Key considerations:
- Close audience viewing → Higher resolution required
- Large surface area → Higher total pixel count needed
- Fine animation detail → 4K recommended
Common professional standards:
- WUXGA (1920×1200) for medium-scale projects
- 4K UHD (3840×2160) for large architectural mapping
- Multi-projector 4K edge blending for landmarks
If resolution is too low relative to projection size, the image will appear soft and pixelated — especially near edges or detailed textures.
For premium outdoor shows, multiple projectors are edge-blended to increase total resolution and brightness simultaneously.
Balancing brightness, lens selection, and resolution ensures your outdoor projection mapping projector delivers consistent clarity, accurate geometry, and maximum visual impact.
Best Outdoor Projection Mapping Projector Technologies for Professional Results
Choosing the right outdoor projection mapping projector is not only about brightness and resolution — it also depends on the underlying projection technology. Different light sources and imaging systems affect color accuracy, durability, contrast ratio, and long-term operating costs.
Understanding these technologies will help you make a smarter investment for professional-grade outdoor installations.
Laser vs. Lamp-Based Projectors
One of the most important technology decisions is the light source.
🔹 Lamp-Based Projectors
Traditional projectors use high-intensity discharge (HID) lamps.
Advantages:
- Lower upfront cost
- Widely available
- Suitable for short-term projects
Limitations:
- Lamp brightness degrades over time
- Higher maintenance costs (lamp replacement)
- Less consistent color performance
- Shorter operational lifespan
Lamp-based systems may be acceptable for temporary or budget-conscious installations, but they are rarely ideal for high-profile outdoor projection mapping.
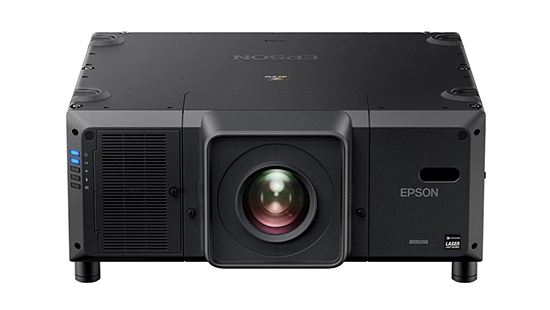
🔹 Laser Projectors (Recommended for Professional Use)
Laser projectors use solid-state laser light sources instead of traditional lamps.
Advantages:
- Higher brightness stability over time
- 20,000+ hour lifespan
- Lower long-term maintenance
- Faster startup and shutdown
- Superior color consistency
- Better performance in large-scale edge blending
For professional outdoor projection mapping projector applications, laser technology has become the industry standard. The reliability and consistent brightness output are critical for multi-night events or permanent installations.
DLP, LCD, and LCoS Comparison
Beyond the light source, the imaging technology also impacts performance.
📌 DLP (Digital Light Processing)
- Excellent contrast ratio
- Smooth motion rendering
- Reliable for large-scale projection
- Common in high-lumen professional systems
DLP is widely used in architectural mapping because of its durability and image stability.
📌 LCD (Liquid Crystal Display)
- Strong color brightness
- Good for vibrant visual content
- Typically lower cost than high-end DLP
However, LCD systems may struggle with deep black levels compared to DLP in outdoor nighttime conditions.
📌 LCoS (Liquid Crystal on Silicon)
- Very high resolution capability
- Smooth image texture
- Excellent detail reproduction
LCoS systems are often used in premium installations where ultra-high resolution is required.
For most large-scale outdoor projection mapping projects, high-brightness DLP laser systems are the most common professional choice.
Edge Blending and Multi-Projector Synchronization
Large buildings often require multiple projectors to cover the full façade. In these cases, technology compatibility becomes critical.
Professional outdoor projection mapping projector systems should support:
- Edge blending
- Geometric correction
- Warping and mapping calibration
- Genlock / frame synchronization
- Media server integration
Edge blending allows multiple projectors to create a seamless, ultra-wide image without visible borders. Synchronization ensures motion graphics remain perfectly aligned across the entire structure.
Without these capabilities, large-scale mapping will show visible seams, brightness inconsistencies, or timing errors.
Selecting the right projection technology ensures:
- Long-term reliability
- Consistent brightness performance
- Accurate color reproduction
- Seamless large-scale coverage
For professional-grade results, laser-based, high-lumen, edge-blend capable projectors are the benchmark standard.
Tips for Setting Up and Optimizing Your Outdoor Projection Mapping Projector
Even the most advanced outdoor projection mapping projector will not deliver professional-grade results without proper setup and optimization. Outdoor environments introduce unpredictable variables, making planning, calibration, and maintenance critical components of a successful projection mapping project.
Below are the essential steps to ensure maximum performance and reliability.
Environmental Planning and Site Survey
Before installing any projector, conduct a thorough site survey. Outdoor projection mapping is highly dependent on physical location and environmental conditions.
Key factors to evaluate:
- Projection surface dimensions and texture
- Ambient light sources (street lamps, signage, nearby buildings)
- Available projector placement distance
- Power supply access
- Safety and crowd control considerations
- Weather exposure risks
Accurate measurement of the façade is essential for proper content creation and projector positioning. Many professional teams use 3D scanning or drone photogrammetry to create precise digital models of buildings.
Site planning also determines:
- Required lens type
- Projector mounting structure
- Need for weatherproof enclosures
- Cable routing and signal distribution
Skipping this stage often leads to alignment issues and reduced visual quality.
Calibration and Warping Techniques
Projection mapping requires precise geometric alignment. Even minor misalignment can distort visuals and break the immersive illusion.
Professional calibration involves:
- Grid-based alignment mapping
- Warping to match architectural contours
- Keystone correction (optical preferred over digital)
- Edge blending for multi-projector systems
Advanced media servers allow pixel-level adjustments, ensuring that visuals align perfectly with windows, columns, and decorative elements.
For multi-projector installations, color matching and brightness balancing are equally important. Inconsistent calibration can create visible seams or brightness shifts across the building.
Regular recalibration is recommended for multi-day events, especially if equipment shifts due to vibration or weather.
Maintenance and Long-Term Performance Optimization
Outdoor projection mapping systems operate under demanding conditions. Preventative maintenance ensures stable performance throughout the event or installation period.
Best practices include:
- Cleaning air filters regularly
- Monitoring internal temperature
- Checking lens alignment before each show
- Inspecting protective enclosures for moisture buildup
- Ensuring stable power supply with surge protection
Laser-based outdoor projection mapping projector systems require less maintenance than lamp-based systems, but cooling and ventilation must still be carefully managed.
For permanent installations, consider:
- Remote monitoring systems
- Automated brightness calibration
- Scheduled technical inspections
Proper maintenance not only protects your investment but also guarantees consistent visual impact across multiple performances.
With correct planning, calibration, and maintenance, your outdoor projection mapping projector can deliver reliable, high-impact visual experiences that captivate large audiences and elevate any architectural space.
Conclusion
Selecting the right outdoor projection mapping projector is the foundation of delivering professional-grade visual experiences. From understanding brightness requirements and resolution scaling to choosing the right lens system and projection technology, every technical decision directly impacts the final result.
Outdoor environments demand more than standard projection equipment. High lumen output, laser light sources, interchangeable lenses, edge blending capability, and proper environmental planning are essential to achieving clarity, reliability, and immersive impact at scale.
Whether you are planning a city-wide festival, brand activation, architectural showcase, or landmark illumination, investing in the correct projection system ensures your content performs exactly as designed — vibrant, sharp, and unforgettable.
Professional projection mapping is where creativity meets precision engineering. And when executed correctly, it transforms buildings into living digital canvases.
Cebirra
Ready to bring your architectural vision to life?
At Cebirra, we specialize in professional outdoor projection mapping solutions designed to deliver maximum visual impact. From equipment consultation and technical planning to full-scale production and system integration, our team ensures every project achieves exceptional clarity, brightness, and reliability.
Whether you need:
- High-lumen laser projector systems
- Multi-projector edge blending setups
- Technical site assessment and calibration
- End-to-end projection mapping production
Cebirra is your trusted partner for professional-grade outdoor projection experiences.
Contact Cebirra today to discuss your upcoming projection mapping project and discover how we can help you create unforgettable large-scale visual experiences.
FAQ: Outdoor Projection Mapping Projectors
How many lumens do I need for an outdoor projection mapping projector?
The required lumens depend on surface size and ambient light. Small facades need 15,000–20,000 lumens, medium buildings require 30,000–40,000 lumens, and large landmarks typically need 50,000+ lumens or multiple stacked projectors for professional visibility.
What is the best projector type for outdoor projection mapping?
High-brightness laser DLP projectors are considered the industry standard for outdoor projection mapping. They offer stable brightness, long lifespan (20,000+ hours), strong contrast, and excellent reliability for large-scale installations.
Is 4K necessary for outdoor projection mapping?
4K resolution is highly recommended for large architectural surfaces or when viewers are positioned close to the projection. For smaller buildings or long-distance viewing, WUXGA may be sufficient, but 4K ensures sharper detail and better visual impact.
Can you use a regular home projector for outdoor projection mapping?
No. Home projectors typically produce 2,000–5,000 lumens, which is insufficient for large outdoor surfaces. They also lack interchangeable lenses, edge blending capability, and durability required for professional outdoor use.
What throw ratio is best for outdoor projection mapping?
The ideal throw ratio depends on projector placement distance. Short throw lenses (0.8:1–1.5:1) are ideal for limited spaces, while long throw lenses (3:1–10:1+) are necessary for projecting across wide streets or large public spaces.
Do outdoor projection mapping projectors need weatherproofing?
Yes. Most professional projectors require IP-rated enclosures for protection against rain, dust, and humidity. Even high-end systems must be properly housed to ensure operational safety and long-term reliability.
How much does a professional outdoor projection mapping projector cost?
Professional high-brightness laser projectors typically range from tens of thousands to hundreds of thousands of dollars, depending on lumen output, resolution, lens options, and edge blending capabilities. Large-scale installations may require multiple units.
What software is used for outdoor projection mapping?
Projection mapping projects commonly use media server software that supports warping, edge blending, geometric correction, and multi-projector synchronization. Professional systems integrate directly with high-lumen outdoor projectors.
How far can an outdoor projection mapping projector project?
Projection distance depends on lens selection and brightness. With long-throw lenses, professional projectors can operate from 50 meters to several hundred meters away while maintaining strong image clarity.
Why is edge blending important in large outdoor projections?
Edge blending allows multiple projectors to combine into one seamless image. This is essential for covering wide buildings and increasing total brightness and resolution without visible seams between projected areas.