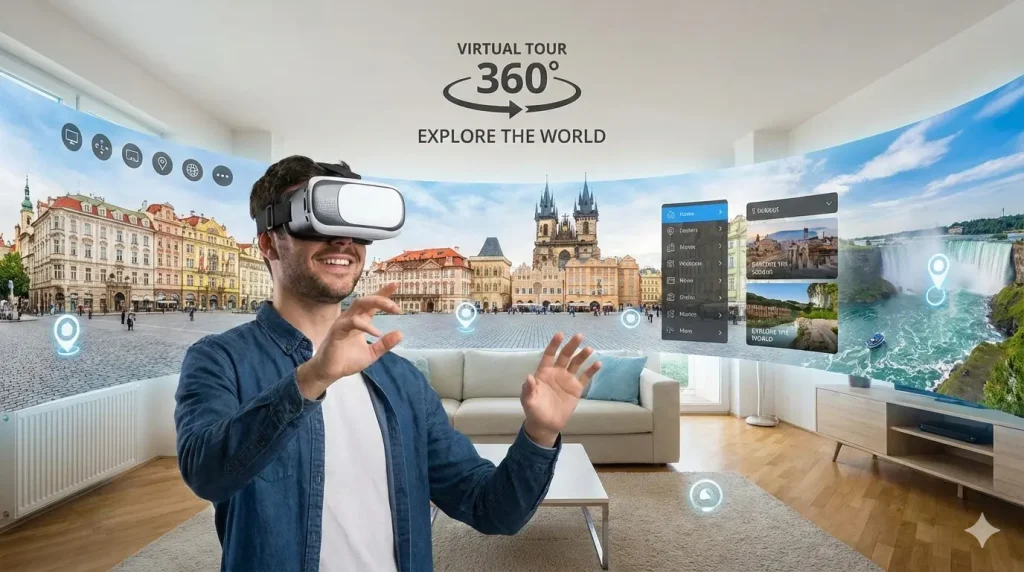
What is a Virtual Tour 360? Beyond the Buzzword
A Virtual Tour 360 is an interactive simulation of a physical location, composed of a sequence of 360-degree panoramic images or videos. These spherical images are stitched together using specialized software, allowing a viewer to control their perspective—looking up, down, and all around—and to navigate from one point to another within the digital environment. This creates an immersive, self-directed exploration that closely mimics the experience of being physically present.
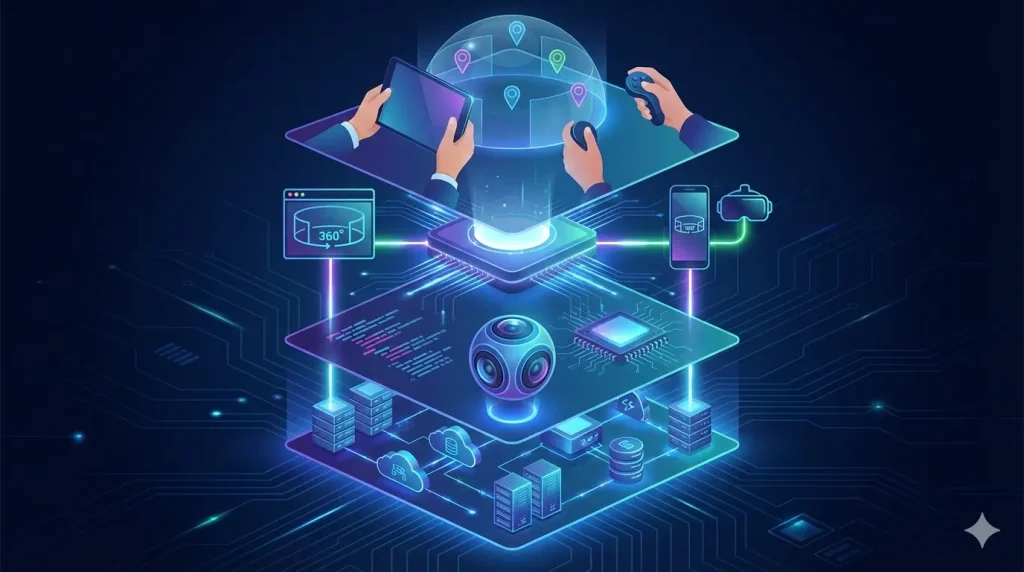
The technology has moved far beyond simple panoramic photos. Modern virtual tours can integrate multimedia elements like informational hotspots, embedded videos, audio narration, floor plans, and direct links to contact forms or product pages. This transforms a passive viewing experience into an active engagement tool.
The core value proposition lies in its ability to overcome geographical and temporal barriers. It provides authentic, transparent access that builds trust and aids in decision-making long before a physical visit is possible. To understand its components, here’s a breakdown of the key technology stack:
Table: The Technology Stack of a Modern Virtual Tour 360
| Component | Description | Key Considerations for Business |
|---|---|---|
| Capture Device | Hardware used to take 360° images/videos. Options range from professional multi-lens cameras to smartphone attachments. | Quality vs. Cost: Professional gear offers higher resolution for large spaces (real estate, venues). Smartphone solutions can be effective for smaller, simple projects. |
| Stitching Software | Software that aligns and blends the individual captures from the camera into a seamless spherical image. | Some cameras offer automatic cloud-based stitching, while professional workflows may use dedicated software like PTGui or Adobe Lightroom for greater control. |
| Tour Creation Platform | The online software where panoramas are linked, navigation is set, and interactive elements (hotspots, info points) are added. | Ease of Use vs. Features: Platforms like Matterport, Kuula, and 3DVista offer different levels of customization, branding, and integration capabilities. |
| Hosting & Delivery | The cloud service where the final tour is stored and from which it is streamed to users on any device. | This is typically handled by your chosen platform. Critical factors include loading speed, mobile responsiveness, and server reliability. |
| Viewing Interface | The player embedded on your website that allows the user to interact with the tour using a mouse, touchscreen, or VR headset. | A clean, intuitive interface is crucial for user experience. Ensure it is fully functional on both desktop and mobile browsers. |
The evolution of this technology means that creating a virtual tour is more accessible than ever, but understanding these components is the first step in making informed decisions about your project. Whether showcasing a listing, a hotel suite, a museum exhibit, or a factory floor, the Virtual Tour 360 serves as a powerful digital twin of your physical space.
Strategic Planning: The Essential First Step (Defining Goals & Audience)
Before you purchase a camera or choose a platform, the most critical phase of your virtual tour project begins not with technology, but with strategy. A successful Virtual Tour 360 is not defined by its technical wizardry alone, but by its ability to achieve specific business objectives for a well-defined audience. Skipping this foundational planning is akin to building a house without a blueprint—you might end up with a structure, but it likely won’t suit your needs.
The process starts with two interconnected questions: “Why are we creating this?” and “Who is it for?”
1. Defining Clear, Measurable Goals
Your virtual tour should be a tool to solve a problem or capitalize on an opportunity. Vague goals like “to look modern” are less effective than actionable, measurable ones. Goals typically fall into a few key categories:
- Engagement & Experience: Increase time spent on your website, provide an innovative experience, or reduce uncertainty about your space.
- Lead Generation & Conversion: Increase qualified inquiries, book more viewings or consultations, or directly boost online sales for bookable spaces (e.g., hotel rooms, event venues).
- Operational Efficiency: Reduce the volume of unnecessary physical visits, pre-qualify clients, or provide remote training and facility tours.
- Marketing & Trust Building: Enhance digital marketing campaigns, improve search engine visibility with rich media, and build transparency and trust with prospects.
2. Profiling Your Target Audience
The design and content of your tour must resonate with its primary users. A tour for commercial real estate brokers will differ significantly from one designed for prospective university students.
- What are their pain points? (e.g., relocation stress, time constraints, uncertainty about quality)
- What information do they seek? (e.g., dimensions, ambiance, specific features, safety protocols)
- How tech-savvy are they? This influences the complexity of the interface.
- What is their decision-making journey? Where does the tour fit in their process?
Aligning your goals with your audience’s needs ensures every element of the tour serves a purpose. The following table illustrates this alignment for different business types:
Table: Aligning Virtual Tour 360 Goals with Audience Needs
| Business Type | Primary Goal | Target Audience | Key Tour Features & Focus |
|---|---|---|---|
| Residential Real Estate | Generate qualified leads & reduce unnecessary physical showings. | Potential buyers/renters, often remote or time-poor. | Seamless flow between rooms, highlight natural light & storage, embed floor plans, include “Request Viewing” hotspots. |
| Hospitality (Hotel/Resort) | Drive direct online bookings. | Travelers comparing options, seeking ambiance and details. | Immersive room views, balcony/viewsite highlights, links to booking engine, showcase amenities (pool, spa, restaurant). |
| Education (University) | Increase applicant engagement and yield. | Prospective students and parents, unable to visit multiple campuses. | Interactive campus map, dorm room tours, lab/classroom views, student life hotspots with video testimonials. |
| Retail (Showroom) | Enhance product confidence and online sales. | High-consideration shoppers researching specs and design. | Product hotspots with detailed specs/links, “in-situ” visualization of items in a room setting, “Contact Sales” calls-to-action. |
| Corporate/Industrial | Support sales, recruitment, and safety training. | B2B clients, potential hires, regulatory bodies. | Highlight scale/cleanliness of facilities, demonstrate safety features, streamline remote client audits, showcase workspace culture. |
By investing time in this strategic planning phase, you create a clear rubric for every subsequent decision—from which rooms to capture to which interactive elements to add. This ensures your Virtual Tour 360 is a strategic asset, not just a technical novelty.
The Creation Process: A Step-by-Step Guide from Capture to Platform
With a solid strategy in place, you can confidently move into the creation phase. This process transforms your physical space into a polished, interactive digital experience. While the specific tools may vary, the workflow generally follows these five key phases: Pre-Production, Capture, Stitching & Editing, Building the Tour, and Publishing.
Phase 1: Pre-Production (The Setup)
This is about preparation. Scout the location and plan your “capture points”—the specific spots where you will take your 360° photos. Think like a director: these points should provide comprehensive coverage and logical pathways for navigation. Ensure the space is impeccably clean and well-lit. Natural light is ideal, but consistent artificial light is better than mixed lighting that can cause color issues. Gather all necessary equipment: camera, tripod, monopod (for elevated shots), batteries, and memory cards.
Phase 2: The Capture
Position your camera on a stable tripod at the planned capture points. The height should be consistent and natural, typically around 5-6 feet tall. For each location, take a full 360° image (or set of images, depending on your camera). Overlap your capture points by 20-30% to ensure smooth navigation between them. For larger or complex spaces (like a corner with two windows), consider taking additional “detail” shots to be used as hotspot content later.
Phase 3: Stitching & Editing (Post-Production)
Upload your captures to your chosen software. The stitching process, often automated, aligns the images into a seamless sphere. Here, you will perform color correction, adjust exposure, and straighten horizons. A crucial step at this stage is “de-ghosting”—removing any temporary objects (like people or moving cars) or visual errors that appear in the stitch lines. The goal is to create a set of clean, professional-looking panoramic images that are ready for assembly.
Phase 4: Building the Interactive Tour
This is where the experience comes to life in your tour platform. Upload your stitched panoramas. First, create the navigation by linking the images together using drag-and-drop connectors or floor plan mapping. Then, layer in your interactive elements:
- Info Hotspots: Icons that reveal text, images, or prices when clicked.
- Multimedia Hotspots: Links to embedded videos, audio clips, or PDF documents.
- Transition Hotspots: Arrows or doorways that move the user to a different area.
- Call-to-Action (CTA) Hotspots: Buttons that lead to contact forms, booking pages, or product listings.
Finally, add branding elements like your logo, custom colors, and a welcome message.
Phase 5: Publishing & Integration
Once the tour is built, the platform will generate an embed code. You publish the tour by copying this code into the HTML of your chosen webpage (e.g., property listing, “Visit Us” page, product page). Ensure it is placed prominently and tested on multiple devices (desktop, tablet, smartphone) for functionality and load speed.
The table below compares two common paths in the creation process, helping you choose the right approach for your resources and goals.
Table: Virtual Tour 360 Creation Paths: DIY vs. Professional Service
| Aspect | DIY Path (Self-Service) | Professional Service Path |
|---|---|---|
| Cost | Lower upfront cost (equipment/software subscription). | Higher per-project fee. |
| Time Investment | High. Requires time to learn, capture, and build. | Low for you. The provider handles the entire process. |
| Quality & Expertise | Dependent on your skill and equipment. There is a learning curve. | Consistently high. Professionals use high-end gear and have artistic/technical expertise. |
| Best For | Small businesses with simple spaces, frequent updates, or tight initial budgets. | High-stakes projects (luxury listings, major marketing campaigns), large/complex spaces, or when premium quality is non-negotiable. |
| Process Control | Full creative control and ability to make instant edits. | You provide direction; the professional executes. Revisions may take time. |
| Output & Features | May be limited by platform tier. Standard interactive features. | Often includes advanced features, superior image quality, and custom programming. |
By following this structured process and choosing the path that aligns with your strategy, you can efficiently create a Virtual Tour 360 that meets your professional standards and business objectives.
Maximizing Impact: How to Integrate and Promote Your Virtual Tour
Creating a stunning Virtual Tour 360 is only half the battle; its strategic placement and active promotion determine its true return on investment. A tour hidden in a submenu is a wasted asset. To maximize its impact, you must integrate it seamlessly into your digital ecosystem and proactively drive traffic to it.
Integration: Making the Tour a Core Part of the User Journey
Your tour should not be an isolated feature but a central touchpoint. Key integration points include:
- Website Homepage or Hero Section: Feature a prominent button or embed a teaser panorama directly on your homepage for immediate engagement.
- Dedicated “Virtual Experience” Page: Create a standalone page for the tour, optimized with descriptive text and keywords (like “virtual tour 360 of [Your Business Name]”) for SEO.
- Key Landing Pages: Embed the tour directly on high-value pages like specific real estate listings, hotel room pages, course descriptions, or venue rental information.
- Email Marketing: Include a compelling screenshot and a direct link to the tour in your email campaigns (newsletters, property alerts, welcome sequences).
- Contact/Sales Funnels: Place the tour link on inquiry forms or confirmation pages, encouraging deeper engagement after initial contact.
Promotion: Actively Driving Eyes to Your Tour
Integration catches organic interest; promotion creates it.
- Social Media Teasers: Share captivating snippets—a stunning 360° view of a key feature—as videos or linked posts on Facebook, Instagram, LinkedIn, and Twitter. Use platform-specific features like Instagram Reels or LinkedIn native video.
- Digital Advertising: Use the tour as a landing page for targeted Google Ads or social media ads. Phrases like “Explore Our Space Virtually!” can attract curious clicks.
- QR Codes: Generate a QR code linking directly to the tour. Place it on physical signage, brochures, business cards, or even storefront windows, bridging the offline and online worlds.
- Leverage Existing Channels: Mention the tour in your email signature, on your booking confirmation emails, and during sales or customer service calls. (“Would you like a virtual walk-through before your visit?”)
- Partnerships & Listings: If applicable, share the tour link on relevant listing sites (e.g., Zillow for real estate, wedding directories for venues).
To understand which channels to prioritize, consider where your target audience spends their time and what action you want them to take. The table below outlines a multi-channel promotion strategy.
Table: Multi-Channel Promotion Strategy for Your Virtual Tour 360
| Channel | How to Use It | Best For / Objective |
|---|---|---|
| Your Website (SEO) | Embed tour on a dedicated page with keyword-rich content (title: “Virtual Tour 360 of Our Facility”). | Long-term organic traffic. Capturing users already searching for you or your services. |
| Email Marketing | Include a prominent “Take the Virtual Tour” button in relevant campaign emails. | Nurturing existing leads/clients. Driving engaged subscribers deeper into your offerings. |
| Social Media | Post short, enticing video clips panning across the best views. Use “Link in Bio” or direct links. | Awareness & engagement. Reaching new audiences and showcasing your brand’s modernity. |
| Paid Ads (Google/Social) | Run ads with compelling visuals that link directly to the tour landing page. | Targeted lead generation. Reaching specific demographics or interest-based audiences. |
| QR Codes (Offline) | Print QR codes on physical marketing materials, signage, or product packaging. | Bridging physical-digital gap. Enhancing in-person experiences or print advertising. |
| Sales & PR Outreach | Include the tour link in your sales pitch decks or press releases about a new location/renovation. | B2B sales & media relations. Providing an instant, impressive overview to busy professionals. |
By thoughtfully integrating your Virtual Tour 360 into your user’s path and actively promoting it across multiple channels, you transform it from a static piece of content into a dynamic, lead-generating engine that works for your business 24/7.
Measuring Success: Key Metrics and ROI of Your Virtual Tour 360
A Virtual Tour 360 is a business investment, and like any investment, its value must be measured. Moving beyond vague impressions like “it looks good” to concrete data is what allows you to demonstrate ROI, justify the cost, and optimize the tour for even better performance. This requires tracking the right metrics and linking them to your initial strategic goals.
The analytics available will depend on your tour platform and website analytics tools (like Google Analytics). Focus on a blend of quantitative data (the “what”) and qualitative insights (the “why”) to get the full picture.
Key Quantitative Metrics to Track:
- Engagement Metrics: These show how captivating your tour is.
- Views/Sessions: Total number of times the tour was loaded.
- Average Engagement Time: The single most important metric. A high average time indicates deep interest. Compare this to the time spent on standard image galleries.
- Interaction Rate: The percentage of users who click on hotspots, open info points, or use the floor plan. This measures active exploration.
- Conversion Metrics: These tie directly to business outcomes.
- Lead Generation: Track form submissions, calls, or booking requests that originate from the page hosting the tour. Use specific UTM parameters or dedicated contact methods (e.g., a “Request Tour” button within the tour itself).
- Conversion Rate: The percentage of tour viewers who take a desired action.
- Bounce Rate Reduction: A successful tour should decrease the bounce rate for the page it’s on, as it encourages visitors to stay and explore.
- Operational Efficiency Metrics:
- Qualified Lead Ratio: An increase in the percentage of leads who are well-informed and serious, as the tour has pre-qualified them.
- Reduction in Pre-Visit Inquiries: Measure if common questions about layout or features decrease.
Calculating ROI:
Return on Investment can be calculated by comparing the value generated to the cost incurred.
- Cost: Include equipment, software subscriptions, and/or professional service fees.
- Value Generated: This is the tangible outcome. For example:
- If your tour helps close one additional property sale or secure one additional wedding booking, the revenue from that deal far outweighs the tour’s cost.
- Calculate the value of time saved for your staff by reducing unnecessary physical tours.
- Assign a value to leads generated from the tour page.
A Simple ROI Formula: (Value Generated from Tour - Total Cost of Tour) / Total Cost of Tour x 100 = ROI %
The table below categorizes key performance indicators (KPIs) to help you build a simple dashboard based on your primary goal.
Table: Key Performance Indicators (KPIs) by Business Goal
| Primary Goal | Key Quantitative Metrics | Key Qualitative Insights & Actions |
|---|---|---|
| Increase Engagement & Trust | 1. Avg. Engagement Time 2. Interaction Rate per Session 3. Pages per Session (on your site) | Are users exploring all areas? If not, the navigation or starting point may need adjustment. Use hotspot analytics to see which information points are popular. |
| Generate Leads & Sales | 1. Lead Conversion Rate (from tour page) 2. Source of Lead (via UTM tracking) 3. Tour-to-Inquiry Time (speed of conversion) | Which call-to-action (CTA) hotspots get the most clicks? Test different CTA text or button colors. Is the contact form easy to access from the tour? |
| Improve Operational Efficiency | 1. Inquiry-to-Visit Ratio (are visits more qualified?) 2. Volume of “Basic Info” Calls/Emails 3. Training Completion Rates (for internal tours) | Are there still frequent questions about an area the tour covers? If so, add a clarifying info hotspot in that spot. |
| Enance Marketing/SEO | 1. Organic Traffic to the tour page 2. Backlinks acquired to the tour 3. Social Shares of the tour link | Which external sites are linking to your tour? Can you partner with them? Are users sharing specific views? Promote those “hero shots” more. |
By consistently monitoring these metrics, you move from guessing to knowing. You can prove that your Virtual Tour 360 is more than an expense—it’s a measurable asset that builds trust, saves time, and directly contributes to your bottom line.
Conclusion
A Virtual Tour 360 is far more than a technological novelty; it is a powerful communication tool, a strategic marketing asset, and a decisive competitive advantage. As we’ve explored, its success hinges not on the complexity of the gear but on the clarity of your strategy—knowing your why and your who before you ever press the capture button. From meticulous planning and a structured creation process to smart integration and data-driven promotion, each step builds upon the last to transform a simple panorama into an immersive experience that builds trust, engages audiences, and drives tangible business outcomes.
Whether you choose the DIY path or partner with a professional, the barrier to entry has never been lower, while the potential impact has never been higher. In a world where digital convenience and authentic experience are paramount, offering a Virtual Tour 360 signals that your business is forward-thinking, transparent, and dedicated to meeting your audience’s needs on their terms. Start by defining one clear goal for your first tour, and take that first step. Your future clients are already looking for a way to step inside—all you need to do is open the digital door.
At Cebirra, we create virtual tour 360 experiences that combine immersive storytelling with technical precision. Since 2016, we have helped businesses, educational institutions, and public organizations transform physical spaces into meaningful digital experiences.
If you are exploring how virtual tour 360 can support your goals, Cebirra is ready to help you design an experience that delivers real impact.